Quick, Cheap, Effective: Your First Wireless Doorbell Camera
A friendly, expert guide to help you choose a budget wireless doorbell camera, prepare the spot, install without wiring, connect to Wi‑Fi, and lock down privacy. You’ll finish fast, save money, and protect your home with confidence today, stress-free, guaranteed.
What You’ll Need
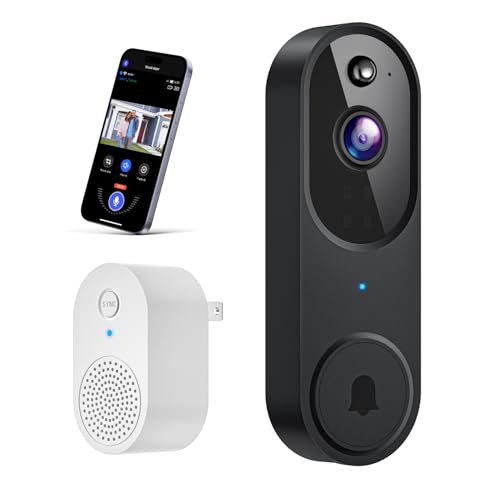
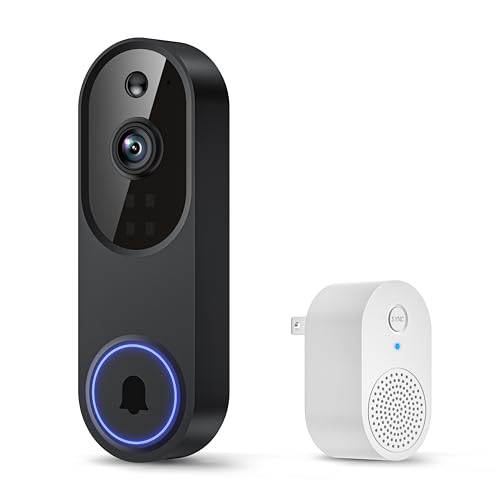
- Budget wireless doorbell camera kit (w/ mount, battery/charger)
- Smartphone
- 2.4 GHz Wi‑Fi
- Screwdriver or drill
- Level and tape measure
- Ladder
- Basic DIY comfort

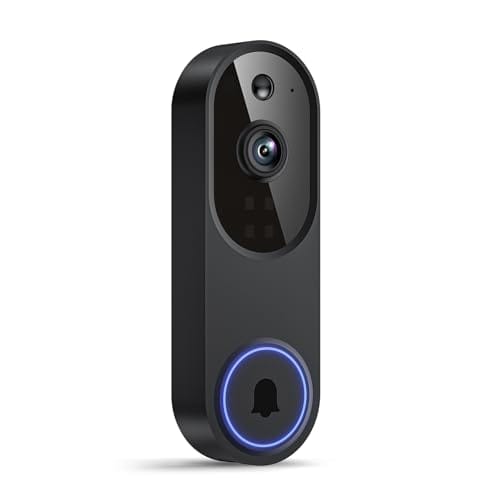
Step 1 — Pick the Right Budget Camera
Compare the essentials before buying. Look for features that actually matter, not gimmicks.
- 1080p video — clear enough to identify faces.
- Night vision — infrared or color low‑light.
- Two‑way audio — talk to visitors or delivery drivers.
- Cloud or local storage — decide if you want subscription fees.
- Reliable motion detection — avoids constant false alerts.
- Battery life — weeks, not days, for practical use.
- 2.4 GHz Wi‑Fi support — most budget cams require it.
- Mounting kit & weatherproofing — included hardware saves hassle.
Read user reviews for real‑world battery and motion performance (search for long‑term posts). Prioritize an easy app setup and a clear return policy. Pick a model with a mounting kit and basic weatherproofing to avoid surprises.
Step 2 — Choose and Prepare the Mounting Location
Choose a spot 4–5 feet high and angle the camera slightly downward to catch faces. Avoid pointing at direct sun or a busy background like trees or a road bright backlight and moving foliage create false alerts.
Check Wi‑Fi signal strength with your phone at the doorway. Move around the exact mounting spot; if the signal is weak, plan for a mesh extender or plug‑in repeater.
Clear the surface and remove any old hardware. Mark screw holes using a level and tape measure so the camera sits straight.
- Quick checklist: 4–5 ft height, slight downward angle, no direct sun, strong Wi‑Fi, clear surface, level marks
Plan for anchors and a masonry bit if mounting on brick or stucco.

Step 3 — Power Up and Get Online
Charge the battery fully before mounting a new battery gives you longer testing time (often 30–60 minutes) so you won’t run out mid‑setup.
Turn off the doorbell circuit at the breaker for wired installs and confirm power is dead with a non‑contact tester or multimeter. For example, check the chime wires before you touch them.
Download the manufacturer app and create an account on your phone. Follow the app’s device‑add wizard and complete these steps:
- Put the camera in pairing mode (press the button or follow the LED pattern).
- Connect to your 2.4 GHz Wi‑Fi network (many cameras don’t support 5 GHz).
- Install any firmware updates the app prompts you to.
Test live video and two‑way audio indoors first stand where the camera will mount and verify feed and talkback before you climb a ladder.
Step 4 — Mount the Bracket and Attach the Camera
Hold the bracket in place, re‑check level, and mark the mounting holes with a pencil. Use a small square or level to verify alignment imagine the lens pointing straight at your walkway.
Drill pilot holes or anchor holes as needed. For example, use a masonry bit for brick and a 3/16″ bit for typical drywall anchors; for wood, drill small pilot holes and screw directly.
Insert appropriate wall anchors for drywall or brick, then screw the bracket on snugly don’t overtighten and strip the anchors. Attach the camera per the manufacturer’s method: slide, snap, or screw it into the bracket.
If the camera includes an angle wedge, install it now and fine‑tune the tilt while live‑viewing. Secure any locking screws or anti‑theft covers if provided.
Step 5 — Configure the App and Smart Settings
Open the camera app and add the device; name it something memorable (e.g., Front Door, Side Gate).
Set motion zones and adjust sensitivity to reduce false triggers from cars or trees drag the zone boxes and test at multiple sensitivity levels.
Enable person detection if available and schedule quiet hours (for example, 10:00 PM–7:00 AM) to mute unnecessary alerts.
Link the camera to Alexa or Google Home for voice access and enable the corresponding skill or integration in your smart‑home app.
Choose recording preferences: pick cloud (note subscription costs and retention) or local SD to avoid fees.
- Test push notifications.
- Check live view latency.
- Try two‑way audio for clear two‑way talk.
Lower sensitivity or shrink motion zones if passing cars still cause alerts.
Step 6 — Test, Secure, and Maintain
Run a checklist: motion triggers, live-stream latency, night vision, doorbell press response, and audio clarity.
Press the bell from the sidewalk and review recorded clips to verify angle and cropping. Walk toward the door at night to confirm IR/night‑vision detail and test two‑way audio for clear speech both ways.
- Tighten mounts and screws.
- Hide or secure exposed wiring (use conduit or zip ties).
- Update firmware and app regularly.
- Recharge batteries on schedule or swap spares.
- Clean the lens monthly with a soft cloth.
Enable tamper alerts, place a visible “camera in use” sticker as a deterrent, or add an inexpensive camera cage if theft or tampering is a concern.
You’re All Set — Enjoy Smarter Entry-Level Security
With careful placement, simple setup, and app tweaks you’ll have reliable, affordable doorstep protection; revisit settings after a week to fine‑tune coverage. Give it a try, adjust as needed, and share your setup and results to help others improve security.


Anyone tried mounting on brick without drilling? I’m renting and can’t make permanent holes. The bracket seems small and I’m nervous about adhesives.
Also, which adhesive did you use that survived rain?
Good question! For renters, heavy-duty outdoor 3M VHB tape is often used, but it depends on surface texture. Brick can be tricky — consider using a removable mounting plate or a freestanding post if adhesives wobble.
I used a masonry-safe adhesive pad and it lasted a season, but in winter it peeled a bit. If possible, use a corner or under-eave spot to reduce direct weather exposure.
Tl;dr: if you’re cheap like me, this guide works. 😆
Mounted a camera in 20 mins, app took longer. Only gripe: the guide assumes everyone’s front door is standard — mine has a weird overhang and I had to angle the mount. A pic or two of angled mounts would be cool.
Good note, Tom. Angled mounting and examples are a great idea — we’ll consider adding images or diagrams showing common awkward entry setups.
Yes! I had to angle mine too. I used a small wedge of plastic between the bracket and wall to get the tilt I needed.
Small rant: the app pushed an update during my initial setup and bricked the camera for 30 minutes. Not the guide’s fault but annoying.
If you set up at night, maybe avoid firmware updates right away? Let others test first 😅
Ugh, firmware timing can be unlucky. Good tip — if you’re doing a quick install at night, consider pausing automatic updates until you confirm the camera is stable.
Love the security tips — esp the bit about changing default passwords. One constructive bit: maybe add a mini-checklist printable for folks to tick off while installing (mount, power, app, rotate, zones, test).
Would’ve made my life easier.
Yes please! I installed two cameras and lost track of steps. A checklist would be clutch.
Thanks, Harper — a printable checklist is a solid suggestion. We’ll look into adding a downloadable checklist in the next update.
Great step-by-step but wish there were more budget camera recs. The guide mentions criteria but not many model suggestions. Any cheap models that actually have decent night vision?
Fair point — we kept the guide vendor-agnostic to remain broadly useful. For night vision on a budget, look for models with IR LEDs and 1080p video; a few reputable budget brands often show up in seasonal deals.
Great guide — super practical for someone like me who’s tech-awkward. Loved the part about picking a budget camera; saved me from overthinking specs.
Quick question: anyone had issues with Wi‑Fi range when mounting at the end of the porch?
I’m using a basic router and the signal seems weak 15 ft away with two walls. Suggestions?
Good catch, Maya — Wi‑Fi range is a common gotcha. Try moving the router a bit or using a cheap Wi‑Fi extender. Also check if the camera supports 2.4 GHz only; that band often has better range through walls.
I had the same issue. I got a small mesh node for $40 and never looked back. Also try changing channel in router settings to reduce interference from neighbors.
If you can, test the camera location with your phone first (walk out there and stream a video). If your phone struggles, camera will too.
Question: For Step 6 — maintenance — anyone recommend a simple cleaning routine? I feel like dirt on the lens could ruin night vision but don’t want to baby the camera every week.
If birds nest nearby, clean more often. Also repositioning to slightly under-eave helps keep splatter off the lens.
I spray a little screen cleaner on the cloth (not directly on the lens) and wipe monthly. Works fine.
Simple routine: wipe lens gently with a microfiber cloth every 1–2 months, check for spider webs and debris, and glance at recent clips for clarity. More frequent in dusty/coastal areas.
Okay, full confession: I accidentally mounted the camera upside down because I skimmed the guide too fast 😂
It worked fine but flipped the image in the app later. For future folks — make sure to test the live view BEFORE you tighten everything down.
Also the part about enabling two-step auth in Step 5 is crucial. Don’t skip security!
I laughed reading this because I once installed mine inside-out. 😅 Apps make it easy to fix, but still — eyeball it before screws go in.
That’s a classic! Many cameras have a setting to rotate the image (180°) in the app — but testing first saves you from redoing the bracket. And yes, two-step is highly recommended.
Pro tip: mark the top of the bracket with tape so you don’t accidentally rotate it when mounting. Saved me an extra screwdriver turn.
Also check motion zones in the app — mounting angle affects false alerts (trees, cars, etc.). Adjusting zones reduced my notifications by 70%.
Haha been there. I used zip ties to hold it temporarily while I checked the view. Easy and low-cost hack.
Short and sweet. Followed Step 3 and got my camera online in like 10 minutes. App setup was a little clunky but doable. Thumbs up.